When my friend Cassidy was a little girl, she and her best friend would sneak into the friend's mom's room and try on her fancy, feathered, stilletto slippers. Do you remember clomping around the house in heels far too big and much too high? I do. In the '70s, my mom had some wooden-heeled sandals that I just adored. Actually, they'd probably be right back in style today.
Anyway, when Cassidy started planning her friend's wedding shower, she really wanted to incorporate the stiletto slipper somehow. Her friend is very glitzy-glam, and Cass was decorating with hot pink, black, and white, so it was a logical leap to decorate the cake with zebra striped fondant and hot pink accents, topped with a beautiful shoe.


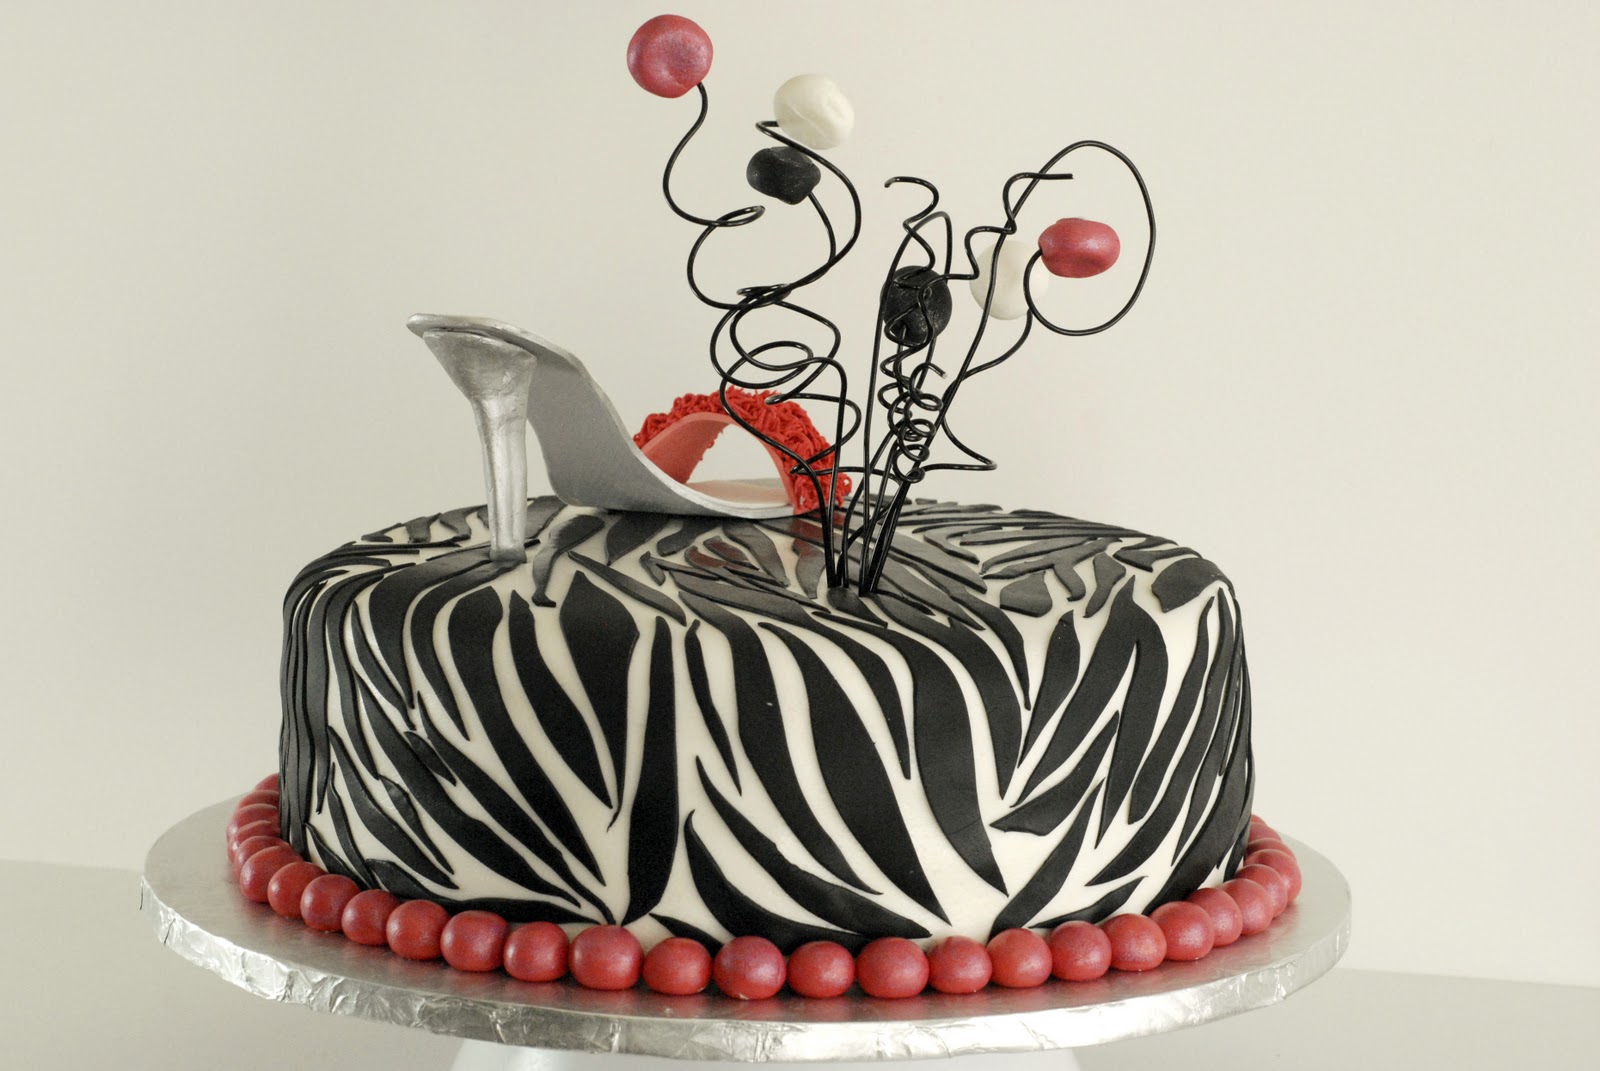
I was really proud of this cake! And more importantly, the bride-to-be loved it. As my husband can vouch, I was a bundle of nerves about the shoe, but we can talk about that in a different post. The zebra striping, while time-consuming, was not hard to do thanks to a great tutorial from My Cake School (from which I also got the idea for the fun cake topper - I thought the shoe would be lonely up there by itself). Rolling out the white fondant big enough to cover the cake was harder since it had to be a 22" circle, which, it turns out, is a lot bigger than I realized. The pink fondant balls were also easy but time-intensive. I rolled out the fondant and cut circles, then rolled them in balls; this kept the size fairly consistent. Guess what? If you leave fondant in the sun, it fades! So I ended up painting them with a mixture of luster dust (for shine), vodka, and hot pink food coloring to restore the color and add some glitter.
The cake was chocolate with vanilla frosting, and I used my go-to recipes. (I do love them both, but I think the proportion of posts in which I refer to one or the other of these recipes has gotten a little out of hand.) After crumb coating the cake and chilling it, I covered it in white Satin Ice fondant. A firm cake is easier to cover and smooth, though you have to work pretty quickly: the fondant can get a little sticky as the cake comes back to room temperature. For the zebra stripes, pre-colored Satin Ice fondant was a great shortcut to eliminate the ridiculous amount of black food coloring needed to color it myself. I rolled it out relatively thin (thick enough that I could work with it, but thin enough that it didn't stick out too far on the cake), cut it in narrow, random shapes, mostly ending in points, and laid them on the cake one at a time. I looked at pictures of zebras, and some have very straight stripes while others have angled or even more wavy stripes, so there was quite a bit of flexibility in how to shape and lay out the stripes. I just started on one side of the cake and worked my way around and over the top.
I always have a hard time figuring out how many fondant balls to make to fit around the cake. It seems to involve higher math - which is to say I find myself trying to remember how to figure the circumference of a circle, and then measuring the size of the balls and multiplying and maybe rotating around an axis or two (just kidding). So I guesstimate and add a few just in case, and it seems to work out okay.
The topper was really fun to make and super easy. I bought heavy gauge black floral wire at Michael's and wrapped coiled pieces around a pencil to form a small spiral and around my small rolling pin to form the larger spiral. I pressed fake diamonds into a few disks of white, black, and pink fondant to attach to the toppers and brushed them with luster dust to add sparkle. Whenever I add wires to a cake, I like to push them into a straw for two reasons: 1) in case there's anything harmful in the wire or coating and 2) to add structure so the wires stand up at the angle you want. I cut the straw just shorter than the height of the cake and it's completely concealed. (Lollipop sticks are inedible, but not poisonous, so I don't worry about them.)
This cake was great fun to plan and make, and I was excited with the challenge of trying a new design. Congratulations to the happy couple, and thanks to Cassidy for the opportunity to help make the day extra special!
Print chocolate cake recipe.
Print vanilla frosting recipe.
Anyway, when Cassidy started planning her friend's wedding shower, she really wanted to incorporate the stiletto slipper somehow. Her friend is very glitzy-glam, and Cass was decorating with hot pink, black, and white, so it was a logical leap to decorate the cake with zebra striped fondant and hot pink accents, topped with a beautiful shoe.


I was really proud of this cake! And more importantly, the bride-to-be loved it. As my husband can vouch, I was a bundle of nerves about the shoe, but we can talk about that in a different post. The zebra striping, while time-consuming, was not hard to do thanks to a great tutorial from My Cake School (from which I also got the idea for the fun cake topper - I thought the shoe would be lonely up there by itself). Rolling out the white fondant big enough to cover the cake was harder since it had to be a 22" circle, which, it turns out, is a lot bigger than I realized. The pink fondant balls were also easy but time-intensive. I rolled out the fondant and cut circles, then rolled them in balls; this kept the size fairly consistent. Guess what? If you leave fondant in the sun, it fades! So I ended up painting them with a mixture of luster dust (for shine), vodka, and hot pink food coloring to restore the color and add some glitter.
The cake was chocolate with vanilla frosting, and I used my go-to recipes. (I do love them both, but I think the proportion of posts in which I refer to one or the other of these recipes has gotten a little out of hand.) After crumb coating the cake and chilling it, I covered it in white Satin Ice fondant. A firm cake is easier to cover and smooth, though you have to work pretty quickly: the fondant can get a little sticky as the cake comes back to room temperature. For the zebra stripes, pre-colored Satin Ice fondant was a great shortcut to eliminate the ridiculous amount of black food coloring needed to color it myself. I rolled it out relatively thin (thick enough that I could work with it, but thin enough that it didn't stick out too far on the cake), cut it in narrow, random shapes, mostly ending in points, and laid them on the cake one at a time. I looked at pictures of zebras, and some have very straight stripes while others have angled or even more wavy stripes, so there was quite a bit of flexibility in how to shape and lay out the stripes. I just started on one side of the cake and worked my way around and over the top.
I always have a hard time figuring out how many fondant balls to make to fit around the cake. It seems to involve higher math - which is to say I find myself trying to remember how to figure the circumference of a circle, and then measuring the size of the balls and multiplying and maybe rotating around an axis or two (just kidding). So I guesstimate and add a few just in case, and it seems to work out okay.
The topper was really fun to make and super easy. I bought heavy gauge black floral wire at Michael's and wrapped coiled pieces around a pencil to form a small spiral and around my small rolling pin to form the larger spiral. I pressed fake diamonds into a few disks of white, black, and pink fondant to attach to the toppers and brushed them with luster dust to add sparkle. Whenever I add wires to a cake, I like to push them into a straw for two reasons: 1) in case there's anything harmful in the wire or coating and 2) to add structure so the wires stand up at the angle you want. I cut the straw just shorter than the height of the cake and it's completely concealed. (Lollipop sticks are inedible, but not poisonous, so I don't worry about them.)
This cake was great fun to plan and make, and I was excited with the challenge of trying a new design. Congratulations to the happy couple, and thanks to Cassidy for the opportunity to help make the day extra special!
Print chocolate cake recipe.
Print vanilla frosting recipe.
Comments
@dawn c: you give me way too much credit, but I'm glad you enjoy the commentary. I find it useful to read other people's comments and suggestions when I'm trying something new - plus, they make a great record for me when I want to dig up an old recipe/method I haven't used in a while!
Glad you enjoyed!