The second cake attempt was definitely more successful. I made 2/3 of the recipe, used the 9x3" pan, and then baked the heck out of it. (Which is to say, I baked it for about an hour and 15 minutes until I was sure it was done.) It is still a very moist cake. However, I torted it into four layers, and it was definitely baked through.
Assembly was surprisingly straightforward, and the end result looks pretty. I'll tell you how it tastes later this weekend.
And look! Pictures! Because, you know, the interweb is better with pictures. (Credit to Kevin for walking me through one camera setting after another until I could get the camera to take something resembling a focused picture.)
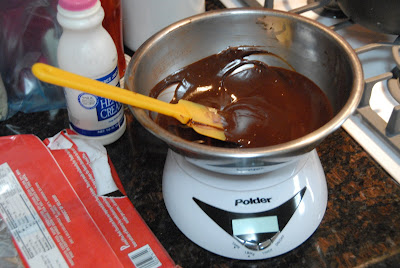
Making ganache:
 Rolling out marzipan in my new, handy-dandy pie dough roller. Look, Ma - no mess!
 Partway through assembly. Cake, raspberry jam, marzipan, ganache, repeat.
 Covered in ganache:
 Marzipan flowers, just for fun:
 And... done!
 Here's how to do it. The recipe for Double Chocolate Layer Cake is from Epicurious. Please note, this is the whole recipe. You can bake it in 3- 9x2" pans or 2- 10x2" pans, or you can make less batter, like I did. I used my own ganache recipe and bought marzipan and raspberry jam. I know you can make marzipan yourself, but I didn't need the added stress.
Cake
3 ounces fine-quality semisweet chocolate such as Callebaut
1 1/2 cups hot brewed coffee
3 cups (21 ounces) sugar
2 1/2 cups (10 5/8 ounces) all-purpose flour
1 1/2 cups (4 1/2 ounces) unsweetened cocoa powder (not Dutch process)
2 teaspoons baking soda
3/4 teaspoon baking powder
1 1/4 teaspoons salt
3 large eggs
3/4 cup vegetable oil
1 1/2 cups well-shaken buttermilk
1 teaspoon vanilla extract (the recipe calls for 3/4 tsp but I wanted more to counter the coffee flavor)
Preheat oven to 300°F and grease pans. Line bottoms with rounds of parchment paper and grease paper.
Finely chop chocolate and place in a bowl. Gently pour hot coffee over. Let mixture stand, stirring occasionally, until chocolate is melted and mixture is smooth. Let cool slightly.
Into a large bowl sift together sugar, flour, cocoa powder, baking soda, baking powder, and salt. In another large bowl with an electric mixer beat eggs until thickened slightly and lemon colored (about 3 minutes with a stand mixer or 5 minutes with a hand-held mixer). Slowly add oil, buttermilk, vanilla, and melted chocolate mixture to eggs, beating until combined well. Add sugar/flour/cocoa mixture and beat on medium speed until just combined well. The coffee taste will be very prominent in the raw batter (I know, because I tasted it!) but the cake won't taste like it at all.
Divide batter between pans and bake in middle of oven until a tester inserted in center comes out clean, 1 hour to 1 hour and 10 minutes. I started testing after 55 minutes but it needed about 75 minutes altogether.
Cool layers completely in pans on racks. Run a thin knife around edges of pans and invert layers onto racks. Carefully remove parchment paper. Cake layers may be made 1 day ahead and kept, wrapped well in plastic wrap, at room temperature.
Ganache
8 ounces good quality bittersweet chocolate, chopped finely
8 ounces heavy cream
Place finely chopped chocolate in a heatproof (metal or glass) bowl. Heat cream over medium heat until it just begins to bubble heavily around the edges. I like to take it off the heat before it really boils. Watch it carefully as it can go from warm to boiling pretty fast.
Carefully pour the hot cream over the chocolate and let it sit for about 3 minutes. Gently stir the chocolate and cream until they come together and the chocolate completely melts. It should be smooth and glossy. Don't overmix - you don't want to add a lot of air to the mixture - but stirring for a few minutes will cool it down just enough to be used right away.
Tips: you may want to make just a few ounces of ganache at a time; otherwise, it will cool down too much and get too firm. Of course, you can just reheat it, but rather than deal with that, just make a little at a time. Ganache is just equal parts cream and chocolate, so you can make 3 ounces at a time, or whatever you want. Also, you may want to have a little extra chocolate and cream on hand in case you need a little more ganache than this.
Assembly
I essentially had 2- 9" layers, and I cut each cooled layer in half to form two thin layers. This is optional - it'll just make for a taller cake with more pretty layers. If you make the whole recipe, you'll have 3- 9" layers, and I probably wouldn't bother torting them. I like to flip my layers over, so the bottom becomes the top. It makes for a more uniform, level cake.
Now you want to start getting all the parts ready so you can move quickly. I am not a big mise en place person, but in this case, it really helps. Make a small amount of ganache. Put some raspberry jam in a dish and heat it in the microwave for a few seconds to warm it up; stir it up to make it smooth and lump-free. Roll out a small ball of marzipan into a circle about 1/8" to 1/4" thick. Try to make the circle just smaller than the cake, but don't make yourself crazy; you can always trim it. You don't want it to hang over the edges.
Place the bottom cake layer on a serving plate. Spread 1-2 tablespoons of raspberry jam evenly over the cake. Top with marzipan and trim, if needed, so it is just smaller than the size of the cake layer. Pour a little ganache (1/3 cup?) on and spread it evenly in a thin layer. It should not go over the sides but should cover the cake. Now, repeat! Cake, jam, marzipan, ganache. When you get to the top layer, take a breather. You need to make sure you have enough ganache to cover the top and sides.
Pour the ganache over the marzipan on the top of the cake. Smooth it toward the edges, allowing it to drip over the sides, and smooth it around the sides of the cake. I found it easier - and prettier - to do a very thin layer like a crumb coat and stick it in the fridge for about 5 minutes to firm up. I then poured a little more ganache over the top (and spread it down the sides) to make sure I hadn't missed any spots.
You can leave it plain like that or you can decorate it further. Swirl the chocolate on the top into a pretty pattern before it sets. Garnish with fresh raspberries or mint leaves or a fresh flower. Form excess marzipan into pretty decorations. It will look beautiful, and hopefully it will taste great, too!
Assembly was surprisingly straightforward, and the end result looks pretty. I'll tell you how it tastes later this weekend.
And look! Pictures! Because, you know, the interweb is better with pictures. (Credit to Kevin for walking me through one camera setting after another until I could get the camera to take something resembling a focused picture.)
Making ganache:
 Rolling out marzipan in my new, handy-dandy pie dough roller. Look, Ma - no mess!
  Partway through assembly. Cake, raspberry jam, marzipan, ganache, repeat.
  Covered in ganache:
 Marzipan flowers, just for fun:
  And... done!
 Here's how to do it. The recipe for Double Chocolate Layer Cake is from Epicurious. Please note, this is the whole recipe. You can bake it in 3- 9x2" pans or 2- 10x2" pans, or you can make less batter, like I did. I used my own ganache recipe and bought marzipan and raspberry jam. I know you can make marzipan yourself, but I didn't need the added stress.
Cake
3 ounces fine-quality semisweet chocolate such as Callebaut
1 1/2 cups hot brewed coffee
3 cups (21 ounces) sugar
2 1/2 cups (10 5/8 ounces) all-purpose flour
1 1/2 cups (4 1/2 ounces) unsweetened cocoa powder (not Dutch process)
2 teaspoons baking soda
3/4 teaspoon baking powder
1 1/4 teaspoons salt
3 large eggs
3/4 cup vegetable oil
1 1/2 cups well-shaken buttermilk
1 teaspoon vanilla extract (the recipe calls for 3/4 tsp but I wanted more to counter the coffee flavor)
Preheat oven to 300°F and grease pans. Line bottoms with rounds of parchment paper and grease paper.
Finely chop chocolate and place in a bowl. Gently pour hot coffee over. Let mixture stand, stirring occasionally, until chocolate is melted and mixture is smooth. Let cool slightly.
Into a large bowl sift together sugar, flour, cocoa powder, baking soda, baking powder, and salt. In another large bowl with an electric mixer beat eggs until thickened slightly and lemon colored (about 3 minutes with a stand mixer or 5 minutes with a hand-held mixer). Slowly add oil, buttermilk, vanilla, and melted chocolate mixture to eggs, beating until combined well. Add sugar/flour/cocoa mixture and beat on medium speed until just combined well. The coffee taste will be very prominent in the raw batter (I know, because I tasted it!) but the cake won't taste like it at all.
Divide batter between pans and bake in middle of oven until a tester inserted in center comes out clean, 1 hour to 1 hour and 10 minutes. I started testing after 55 minutes but it needed about 75 minutes altogether.
Cool layers completely in pans on racks. Run a thin knife around edges of pans and invert layers onto racks. Carefully remove parchment paper. Cake layers may be made 1 day ahead and kept, wrapped well in plastic wrap, at room temperature.
Ganache
8 ounces good quality bittersweet chocolate, chopped finely
8 ounces heavy cream
Place finely chopped chocolate in a heatproof (metal or glass) bowl. Heat cream over medium heat until it just begins to bubble heavily around the edges. I like to take it off the heat before it really boils. Watch it carefully as it can go from warm to boiling pretty fast.
Carefully pour the hot cream over the chocolate and let it sit for about 3 minutes. Gently stir the chocolate and cream until they come together and the chocolate completely melts. It should be smooth and glossy. Don't overmix - you don't want to add a lot of air to the mixture - but stirring for a few minutes will cool it down just enough to be used right away.
Tips: you may want to make just a few ounces of ganache at a time; otherwise, it will cool down too much and get too firm. Of course, you can just reheat it, but rather than deal with that, just make a little at a time. Ganache is just equal parts cream and chocolate, so you can make 3 ounces at a time, or whatever you want. Also, you may want to have a little extra chocolate and cream on hand in case you need a little more ganache than this.
Assembly
I essentially had 2- 9" layers, and I cut each cooled layer in half to form two thin layers. This is optional - it'll just make for a taller cake with more pretty layers. If you make the whole recipe, you'll have 3- 9" layers, and I probably wouldn't bother torting them. I like to flip my layers over, so the bottom becomes the top. It makes for a more uniform, level cake.
Now you want to start getting all the parts ready so you can move quickly. I am not a big mise en place person, but in this case, it really helps. Make a small amount of ganache. Put some raspberry jam in a dish and heat it in the microwave for a few seconds to warm it up; stir it up to make it smooth and lump-free. Roll out a small ball of marzipan into a circle about 1/8" to 1/4" thick. Try to make the circle just smaller than the cake, but don't make yourself crazy; you can always trim it. You don't want it to hang over the edges.
Place the bottom cake layer on a serving plate. Spread 1-2 tablespoons of raspberry jam evenly over the cake. Top with marzipan and trim, if needed, so it is just smaller than the size of the cake layer. Pour a little ganache (1/3 cup?) on and spread it evenly in a thin layer. It should not go over the sides but should cover the cake. Now, repeat! Cake, jam, marzipan, ganache. When you get to the top layer, take a breather. You need to make sure you have enough ganache to cover the top and sides.
Pour the ganache over the marzipan on the top of the cake. Smooth it toward the edges, allowing it to drip over the sides, and smooth it around the sides of the cake. I found it easier - and prettier - to do a very thin layer like a crumb coat and stick it in the fridge for about 5 minutes to firm up. I then poured a little more ganache over the top (and spread it down the sides) to make sure I hadn't missed any spots.
You can leave it plain like that or you can decorate it further. Swirl the chocolate on the top into a pretty pattern before it sets. Garnish with fresh raspberries or mint leaves or a fresh flower. Form excess marzipan into pretty decorations. It will look beautiful, and hopefully it will taste great, too!
Comments
Thanks for stopping by my blog! Sorry for the delay, but I wrote back about your question about the lighting...it's on this post: http://foodlibrarian.blogspot.com/2009/04/national-library-week-day-5-with.html